Watching seeds sprout right before your eyes is a thing of beauty, isn’t it? But the amount of work and effort that goes behind the process, is well….tricky. Seed planting is a major deciding factor that can make or break your garden. Now - you could be a soil planter fan, but enjoying the benefits of running a hydroponic system has its own perks.
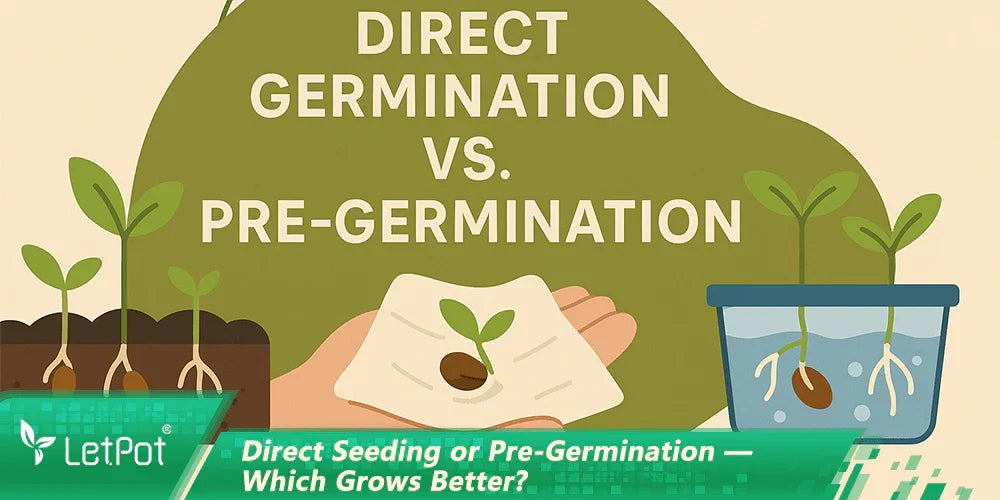
Commonly, there are two germination methods you can go for. Direct Seed Germination and Pre-Germination. Two approaches that, depending on your crop and setup, can save you time, effort, and maybe even a few lost seeds.
Both soil gardeners and hydroponic growers use these methods, but the approach and benefits differ. Knowing which method to use for your situation can do wonders.
Let’s commence!

Direct Seed Germination Methods
Direct seed germination is exactly what it sounds like: you plant seeds directly where they will grow. There’s no middle step, no sprouting on paper towels, no nursery trays. As simple as that!
In soil germination: you sow directly into garden beds, pots, outdoor rows.
In hydroponics: you sow directly into rockwool cubes, coco coir, perlite mixes, rapid rooters, peat pellets, or starter plugs. Seeds germinate and grow in the same place since there’s no transplanting or relocation needed.
When Direct Germination is Suitable
Soil Growers Use It When:
-
Growing hardy crops (beans, carrots, radishes).
-
Working with large outdoor beds or raised gardens.
-
Space isn’t an issue.
-
Seeds are cheap and easy to replace.
Hydroponic Growers Use It When:
-
Growing fast-germinating crops (lettuce, microgreens, baby greens).Dealing with commercial systems having hundreds of plugs, simultaneously.
-
Watering and humidity is automated.
-
Trying to avoid transplant shock.
-
Time or labor is limited.
Direct seeding works great when you trust the seed and conditions are stable. But is it always the best? Ermm, let's see.
Outdoor Direct Seeding (Soil-Based)
If you're sowing directly into soil outdoors, there’s more prep work involved.
1. Preparing the soil
Loosen the top 6 - 8 inches. Remove rocks, roots, debris. Seeds need softness to break through.
2. Bed prep
Flat surface for uniform depth. Raised bed if drainage is poor.
3. Soil temperature
Different crops have different needs:
-
Lettuce: 45–75°F.
-
Beans: 70–90°F.
-
Carrots: 55–75°F.
Know that if you plant too early, seeds might rot. If you do it too late, they might bolt.
4. Moisture
Soil must be consistently damp, not soaked. Overwatering can lead to rot. And underwatering can cause the germination to fail.
5. Weed control
If weeds germinate first, they steal all the nutrients. Prevention is easier than removing it later.
Hydroponics Note: Outdoor hydroponics is rare, but in greenhouse systems, growers still directly plant seeds into plugs, rockwool cubes, or NFT channels. Same concept, just cleaner and more controlled.
Seeding Process (Hydroponics)
There’s no denying that direct seeding is a whole different vibe, and you can have some fun experimenting with it. But lately, people seem to be all in for hydroponics. Unlike soil, hydroponic growing systems are all about precision and control. You’re basically giving your seeds a spa treatment from day one.
-
Choosing the Right Medium: Start with rockwool cubes, rapid rooters, or peat pellets. These little cubes are amazing as they hold moisture, provide support, and give roots the perfect start. If you’re using net pots, make sure the medium fits snugly; you don’t want the seed floating away.
-
Pre-Soaking and pH Adjustment: Before planting, soak the cubes in pH-balanced water for about 30 minutes. This will make sure that the seeds will not be bothered with acidity or alkalinity. A quick tip: aim for a pH around 5.5 - 6.5. It’s the sweet spot that makes roots happy.
-
Planting the Seeds: Gently press the seed about 2–3 times its diameter into the cube. No deep holes; tiny seeds like to snuggle close to the surface. After that, give it a gentle mist of water.
-
Humidity Domes and Warmth: To mimic a cozy greenhouse, cover the trays with a humidity dome. This keeps moisture from escaping and creates a mini tropical environment. You can also use a small heat mat underneath if the room’s a little chilly, seeds love warmth.
-
Light and Airflow: Light is significant even at this initial stage. The seedlings are maintained under low LED grow lights, 10 -12 hours a day. And airflow? Well, it is worth remembering, little fans stop mold and make the little sprouts become stronger.
-
Transition to Main Hydroponic System: The roots start to protrude at the bottom of the cube (usually 1 2 cm) and that is the time when they are ready to be in the main system. Upon placing all the cubes in the channels of NFT, DWC buckets, or Kratky reservoirs, make sure that the roots are in the nutrient solution and the plant is supported.
- Post-Planting Care: Inspect the seedlings on a daily basis after planting. Are they wet, erect, and in the direction of the light? If yes, keep up with a light misting and nutrient schedule. Otherwise, change humidity, temperature, or light - minute changes can be enormous.
Planting Techniques (Both Soil And Hydroponics)

Here’s what to focus on for both soil and hydroponic growing systems:
-
Seeding Depth: A rule to follow is 2–3x the seed diameter. Tiny seeds go shallow, big ones go deeper.
-
Spacing & Density: The rows of soil are broader; the hydro trays are narrower. Just change depending on the kind of crop.
-
Even Distribution: When dealing with small plots, use hand sowing, and seeders assist with bigger plots.
Managing the Environment
This part is crucial:
-
Soil: Keep tabs on moisture, temperature, and sunlight carefully.
-
Hydroponics: Use a humidity dome and place the seedlings under it. Moreover, you can also heat mats. Do not forget to balance pH, and mist gently.
-
Airflow & Oxygen: Good circulation prevents mold and damping-off in both systems.
Post-Planting Care
Thinning seedlings:
-
Soil: snip weak seedlings.
-
Hydro plugs: gently remove extras so one plant dominates.
Fertilizing:
-
Soil: wait 2–3 weeks before feeding.
-
Hydroponics: introduce very light nutrient solution only after sprouting. Too early = burn.
Pest/disease control:
-
Soil: pests, soil-borne diseases.
-
Hydroponics: algae, fungal growth from constant moisture.
Early observation = higher survival.
Indoor Direct Seeding (Soil Vs. Hydroponics)
For Soil:
-
Use containers that have good drainage.
-
Airy potting mix works best (should be light).
-
Maintain temperature (65–75°F).
-
Provide grow lights (12–14 hours).
-
Water from bottom if possible.
-
Rotate for even light exposure.
For Hydroponics:
-
Choose plug or cube (rockwool, rapid rooters, peat pellets).
-
Soak cubes and adjust pH balance in hydroponics to 5.5–6.0 before planting.
-
Place cubes in seedling trays or net pots.
-
Keep under the humidity dome.
-
Use plain water or extremely mild nutrient solution until sprouted.
-
Switch to a growing system with hydroponics when roots begin to grow out of the bottom.
And just like that, direct seeding is complete.
Pre-Germination Methods

Folks pre-germination since it affords them some control. The seeds germinate in a controlled condition and then strike soil or hydro medium. You’ll be able to track the viability, the root growth, and prevent wasting of space.
Why We Vouch For This Method:
-
You can check seed viability.
-
You save space.
-
You only plant successful seeds.
-
You can see root development early.
-
You eliminate guesswork.
In hydroponics growing systems, this is extremely popular.
When Pre-Germination is Suitable
-
Rare or expensive seeds
-
Seeds with inconsistent germination
-
Poor outdoor conditions (cold, too wet, too dry)
-
Hydroponics (to avoid clogging systems with dead seeds)
-
When uniform growth matters (commercial harvesting, synchronized crop cycles)
Gardeners use it all the time for peppers, tomatoes, herbs, and leafy greens.
The Damp Paper Towel Method
-
Materials: Grab unbleached paper towels, zip-lock bags or containers, spray bottle, optional mild nutrient soak for hydro, labels.
-
Process: Moisten the towel, spread seeds, fold and seal, then store in a warm, dark place. Daily checks for moisture and mold are a must.
-
Environment: Keep temperatures between 20–25°C, mostly in darkness until sprouting. Heat mats help in cooler areas.
-
Transplanting: Once the radicle is 1–2 cm, gently move seedlings into soil holes or pre-soaked hydro plugs.
Best Species: Herbs, peppers, tomatoes, leafy greens; hydro growers love lettuce, basil, spinach; soil growers often use it for slow germinators or rare plants.
Other Effective Pre-Germination Techniques

Let’s go through a few more that people use in different scenarios.
1. Water Soaking Method
Begin by soaking the seeds in water for 12 to 48 hours. Doing so, hydrates the seed coat and speeds germination. Moreover, hydroponic growers can use oxygenated water or diluted nutrient solution.
After soaking, move seeds to a paper towel - OR, directly into the plug/soil.
2. Vermiculite/Perlite Method
Seeds are started in a sterile, inert medium. This method offers great airflow, excellent moisture retention, prevents damping off and works for both soil and hydroponic nurseries.
3. Rockwool and Hydroponic Plugs
This is commercial growers’ favorite. It holds moisture beautifully, is easy to handle, and allows oxygen to reach roots. Know that pH prep is required before seeding and once roots emerge, plug goes straight into hydroponics growing system.
4. Seed Starting in Cells/Containers (Hybrid)
This is a middle ground between direct sowing and full pre-germination. Seeds are planted into small cells/containers with soil or inert mix. It offers a controlled environment (light, temperature, humidity). You can transplant it into soil or hydro after sprouting (much less transplant shock this way).
Side-by-Side Comparison (Direct vs. Pre-Germination)

Comparing them, system by system, let’s have a look.
1. Germination Rate Success
Soil:
-
Direct: lower success (random and unpredictable conditions).
-
Pre: higher success (gives good amount of control).
Hydroponics growing system:
-
Direct germination: It offers moderate success by providing suitable conditions that offer control. However, the quality of seed can differ).
-
Pre: very high success (only successful seedlings are transplanted).
I personally believe that Pre-germination in hydroponics wins here.
2. Time to Maturity
Direct: delayed initiation, the seeds require time to penetrate soil or medium.
Pre-germination: It doesn’t take much time to plant. Wondering why? Remember that our seedlings were already active prior to planting. In fact, this is sped up further thanks to the use of hydroponics having moisture and oxygen present at all times.
Winner: Pre-germination + hydroponics growing system combo.
3. Labor Requirements
Direct:
-
Less handling.
-
Less time.
-
Simpler initially.
-
But more thinning and re-seeding later.
Pre-germination:
-
More steps at the start.
-
More control.
-
Saves space, reduces waste.
In a hydroponics growing system, prepping plugs or tray setups is easy and scalable.
Winner: Go with Direct if you want to keep things simple. And Pre-germination, if you're aiming for precision.
4. Cost Analysis
Direct seeding:
-
Low cost.
-
Minimal materials.
Pre-germination:
-
Needs trays, towels, bags, domes, etc.
Hydroponics vs Soil:
-
Hydroponics equipment costs more (lights, pumps, plugs).
-
However, when established, it is very efficient and less wasteful in the long run.
Winner: The Direct is less expensive, but hydroponics growing system with pre-germination provides a greater ROI.
5. Success Rate for Beginners
Soil Direct Sow:
Good for beginners, but it is uncertain. Meaning, unfavorable circumstances force many novices into failure.
Hydro Direct Sow:
Need to be more conscious of moisture, pH.
Pre-Germination:
More successful, but needs time and a little attention.
Best method for beginners overall?
Pre-germination + simple hydroponics growing system (like DWC or Kratky) = consistent results.
More successful, but needs time and a little attention.
Best method for beginners overall?
Pre-germination + simple hydroponics growing system (like DWC or Kratky) = consistent results.
Best Use Cases
Choose Direct Germination When:
-
Soil: hardy crops, large areas, low budget, outdoor gardens.
-
Hydroponics: fast-germinating leafy greens, microgreens, automated systems.
Choose Pre-Germination When:
-
Soil: unfriendly weather, seldom growing seeds, slow germinators.
-
Hydroponics: to make sure that only healthy seedlings get into the system (VERY common in hydro).
Hybrid Approaches (The Best of Both)
-
Start seeds in a paper towel, then move to plug or soil.
-
Start in a plug/cube, then transplant to soil or hydro.
This method gives consistent success with minimal shock. Honestly? This is how most commercial hydroponic farms do it, and for good reason.
Final Verdict: So… Which Method Wins?
Both methods work. Both have value. Both are used by soil growers and hydroponic growers every day.
If you’re growing in soil and planting hardy, fast-growing crops then direct seeding is perfectly fine. But if you’re using a hydroponics growing system… pre-germination wins. Every. Single. Time.
Why? Because hydroponics is all about control, precision, and efficiency. And pre-germinating seeds before placing them into the system guarantees success and prevents root issues or wasted plugs.
Plus, with tools like an indoor hydroponic garden kit or even a smart hydroponic planter, pre-germination becomes effortless. Once seedlings are ready, you plug them in, add your nutrient solution, maintain your pH balance in hydroponics, and watch them take off.
Hydroponics gives consistent moisture, oxygen, and nutrients directly to the roots - something soil simply can’t match on the same level.
That’s how you turn a single seed… into a perfectly uniform, fast-growing, high-yield plant.
And at the end of the day? That’s what we’re all after - better growth, fewer failures, and a system we can depend on.
Hydroponics growing system for the win.

Leave a comment
All comments are moderated before being published.
This site is protected by hCaptcha and the hCaptcha Privacy Policy and Terms of Service apply.